https://medium.com/sathittham/arduino-lcd-16x2-hello-world-dca09fd904f8
[Arduino] LCD 16x2, Hello World !

มาต่อกับการแสดงผล Output แบบ LCD หรือชื่อเต็มๆเคือ Liquid Crystal Display กันนะครับ
เรียกให้ชัดๆก็คือหน้าจอ Character LCD ขนาด 16 ตัวอักษร จำนวน 2 บรรทัดนั้นเองครับ
สำหรับ LCD ส่วนใหญ่ที่ใช้กัน ก็จะใช้ Controller ของ Hitachi เบอร์ HD44780 ครับ
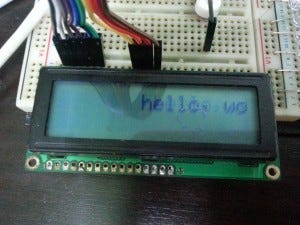
เริ่มแรกก็ทำการ Hello World ! กันก่อนนะครับ
โดย Code ทั้งหมดในตัวอย่างนี้จะใช้ library หน้าจอของ LiquidCrystal นะครับ
เรียกให้ชัดๆก็คือหน้าจอ Character LCD ขนาด 16 ตัวอักษร จำนวน 2 บรรทัดนั้นเองครับ
สำหรับ LCD ส่วนใหญ่ที่ใช้กัน ก็จะใช้ Controller ของ Hitachi เบอร์ HD44780 ครับ
เริ่มแรกก็ทำการ Hello World ! กันก่อนนะครับ
โดย Code ทั้งหมดในตัวอย่างนี้จะใช้ library หน้าจอของ LiquidCrystal นะครับ
ขาของ LCD จะมีอยู่ 16 ขา อธิบายเพิ่มเติมของขาแต่ละขากันสักนิดนะครับ
- GND : Ground ระหว่าง ไมโครคอนโทรลเลอร์กับ LCD
-VCC : ไฟเลี้ยง LCD ขนาด +5VDC
-VO : ขาสำหรับปรับความสว่างของหน้าจอ LCD
-RS : Register select ใช้บอกให้ LCD Controller ว่า ข้อมูลที่ส่งให้ขา Data เป็นคำสั่งหรือข้อมูล
-R/W : Read/Write ใช้กำหนดว่าจะอ่านหรือเขียนข้อมูลกับ LCD Controller
-E : Enable ใช้กำหนดการทำงานให้กับ LCD Controller
-DB0-DB7 : เป็นขาสัญญาณ Data ใช้เขียนหรืออ่านข้อมูล/คำสั่ง กับ LCD Controller
การต่อ LCD จะทำได้ 2 แบบครับ
- 4 Bit : ใช้ 7 ขา I/O ต่อกับ arduino
- 8 Bit : ใช้ 11 ขา I/O ต่อกับ arduino
สำหรับการแสดงผลข้อความโดยทั่วไปจะใช้กันแค่ 4 bit ครับ ดังตัวอย่างก็เช่นกันครับ
- 4 Bit : ใช้ 7 ขา I/O ต่อกับ arduino
- 8 Bit : ใช้ 11 ขา I/O ต่อกับ arduino
สำหรับการแสดงผลข้อความโดยทั่วไปจะใช้กันแค่ 4 bit ครับ ดังตัวอย่างก็เช่นกันครับ
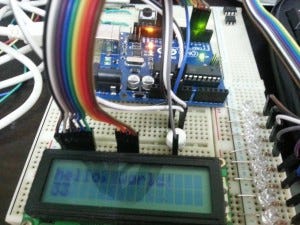
Example 1 : Character LCD 16x2เราจะทำการทดของเขียนโปรแกรม Hello World จากโค๊ดตัวอย่างก่อนนะครับ
ดูว่าเราต่อวงจรถูกต้องไหมก่อนนะครับ
ดูว่าเราต่อวงจรถูกต้องไหมก่อนนะครับ
Hardware :
- Arduino UNO R3 จำนวน 1 อัน
- LCD 16x2 จำนวน 1 อัน
- R ปรับค่าได้ (Potentiometer) 10K (จะเรียกสั้นๆว่า 10K pot นะครับ) จำนวน 1 อัน
- สายจั๊ม
- โปรโตบอร์ด
- LCD 16x2 จำนวน 1 อัน
- R ปรับค่าได้ (Potentiometer) 10K (จะเรียกสั้นๆว่า 10K pot นะครับ) จำนวน 1 อัน
- สายจั๊ม
- โปรโตบอร์ด
Circuit :
โดยเราจะต่อวงจร LCD เข้ากับ Arduino ดังภาพนะครับ
ภาพการต่อวงจรอย่างง่ายนะครับ

ถ้าดูแบบเป็นวงจรหน่อยก็แบบนี้ครับ
โดยเจ้าหน้าจอ LCD จะมีขาอยู่ 16 ขา จะต่อดังนี้นะครับ
- LCD RS ต่อกับ Digital 12
- LCD Enable ต่อกับ Digital 11
- LCD D4 ต่อกับ Digital 5
- LCD D5 ต่อกับ Digital 4
- LCD D6 ต่อกับ Digital 3
- LCD D7 ต่อกับ Digital 2
- LCD Gnd และ LCD R/W ต่อเข้ากับ ขาข้างซ้ายหรือขวาของ 10K pot ก็ได้ครับ แล้วจั๊มเข้า GND ครับ
- LCD Vcc ต่อกับ ขาอีกข้างของ 10K pot แล้วจั๊มเข้า 5V ครับ
- LCD VO ต่อกับ ขากลางของ 10K pot ครับ
CODE :
// include the library code:
#include <LiquidCrystal.h>
// initialize the library with the numbers of the interface pins
LiquidCrystal lcd(12, 11, 5, 4, 3, 2);
void setup() {
  // set up the LCD's number of columns and rows:
  lcd.begin(16, 2);
  // Print a message to the LCD.
  lcd.print("hello, world!");
}
void loop() {
  // set the cursor to column 0, line 1
  // (note: line 1 is the second row, since counting begins with 0):
  lcd.setCursor(0, 1);
  // print the number of seconds since reset:
  lcd.print(millis()/1000);
}
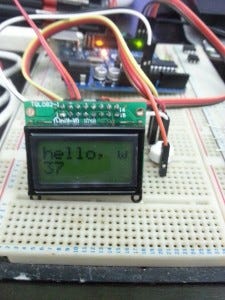
Example 2 : LCD 8x2
หลายคนอาจสงสัยว่าแล้วถ้าไม่มี LCD 16x2 ละใช้ 8x2 แทนได้ไหม
ก็ต้องตอบว่าได้แน่นอนครับ ซึ่งก็ไม่ต่างกันมากครับ ต่างกันตรงขนาดตัวอักษรแค่นั้นเอง
ที่เหลือเหมือนกันหมดครับ
Hardware :
- Arduino UNO R3 จำนวน 1 อัน
- LCD 8x2 จำนวน 1 อัน
- R ปรับค่าได้ (Potentiometer) 10K (จะเรียกสั้นๆว่า 10K pot นะครับ) จำนวน 1 อัน
- สายจั๊ม
- โปรโตบอร์ด
Circuit :
โดยเราจะต่อวงจร LCD เข้ากับ Arduino ก็เหมือนเดิมเลยครับ
เพียงแต่เปลี่ยนลำดับการนับขาหน่อยเท่านั้นเองครับ
CODE : (โค๊ดเดิมเลยครับ)
// include the library code:
#include <LiquidCrystal.h>
// initialize the library with the numbers of the interface pins
LiquidCrystal lcd(12, 11, 5, 4, 3, 2);
void setup() {
  // set up the LCD's number of columns and rows:
  lcd.begin(16, 2);
  // Print a message to the LCD.
  lcd.print("hello, world!");
}
void loop() {
  // set the cursor to column 0, line 1
  // (note: line 1 is the second row, since counting begins with 0):
  lcd.setCursor(0, 1);
  // print the number of seconds since reset:
  lcd.print(millis()/1000);
}
Example 3 : Blink() และ noBlink()
ตัวอย่างนี้จะใช้คำสั่ง (method) Blink() เพื่อทำการกระพริบบล๊อกของ cursor
และใช้คำสั่ง (method) noBlink() เพื่อทำการยกเลิกการกระพริบนั้นเอง
Hardware
เหมือนด้านบนนะครับ
Circuit
ก็ต่อเหมือนด้านบนเช่นกันครับ
Code
// include the library code:
#include <LiquidCrystal.h>
// initialize the library with the numbers of the interface pins
LiquidCrystal lcd(12, 11, 5, 4, 3, 2);
void setup() {
  // set up the LCD's number of columns and rows:
  lcd.begin(16, 2);
  // Print a message to the LCD.
  lcd.print("hello, world!");
}
void loop() {
  // Turn off the blinking cursor:
  lcd.noBlink();
  delay(3000);
   // Turn on the blinking cursor:
  lcd.blink();
  delay(3000);
}
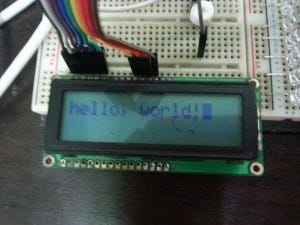
Example 4 : cursor() และ noCursor()
ตัวอย่างนี้จะใช้คำสั่ง (method) cursor() เพื่อทำการกระพริบของ cursor แบบ underscore (_)
และใช้คำสั่ง (method) noCursor() เพื่อทำการยกเลิกการกระพริบนั้นเอง
Hardware
เหมือนด้านบนนะครับ
Circuit
ก็ต่อเหมือนด้านบนเช่นกันครับ
Code
// include the library code:
#include <LiquidCrystal.h>
// initialize the library with the numbers of the interface pins
LiquidCrystal lcd(12, 11, 5, 4, 3, 2);
void setup() {
  // set up the LCD's number of columns and rows:
  lcd.begin(16, 2);
  // Print a message to the LCD.
  lcd.print("hello, world!");
}
void loop() {
  // Turn off the cursor:
  lcd.noCursor();
  delay(500);
   // Turn on the cursor:
  lcd.cursor();
  delay(500);
}
Example 5 : display() และ noDisplay()
ตัวอย่างนี้จะใช้คำสั่ง (method) display() เพื่อทำกาเปิดหน้าจอ
และใช้คำสั่ง (method) noDisplay() เพื่อทำการปิดหน้าจอ
พอนำมารวมกันก็จะเป็นการสั่งกระพริบทั้งหน้าจอนั้นเองครับ
Hardware
เหมือนด้านบนนะครับ
Circuit
ก็ต่อเหมือนด้านบนเช่นกันครับ
Code
// include the library code:
#include <LiquidCrystal.h>
// initialize the library with the numbers of the interface pins
LiquidCrystal lcd(12, 11, 5, 4, 3, 2);
void setup() {
  // set up the LCD's number of columns and rows:
  lcd.begin(16, 2);
  // Print a message to the LCD.
  lcd.print("hello, world!");
}
void loop() {
  // Turn off the display:
  lcd.noDisplay();
  delay(500);
   // Turn on the display:
  lcd.display();
  delay(500);
}
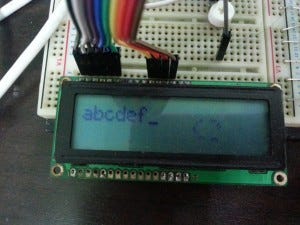
Example 6 : กำหนดทิศทางการเขียนข้อความ (leftToRight() และ rightToLeft())
ตัวอย่างนี้จะใช้คำสั่งเพื่อกำหนดหนดทิศทางของข้อความที่เราต้องการให้แสดง
ใช้คำสั่ง (method) leftToRight() เพื่อให้ข้อความพิมพ์ทางทางซ้ายไปทางขวา
ใช้คำสั่ง (method) rightToLeft() เพื่อให้ข้อความพิมพ์ทางทางขวาไปทางซ้าย
โดยตัวอย่างจะพิมพ์ a-z โดย พิมพ์ a-m ไปทางขวา จากนั้นก็จะพิมพ์ n-s ไปทางซ้าย (ทับอันเก่า)
จากนั้นก็จะพิมพ์ t-z กลับไปทางขวา พอถึง z ก็จะกลับไปพิมพ์ a-z ใหม่นะครับ
Hardware
เหมือนด้านบนนะครับ
Circuit
ก็ต่อเหมือนด้านบนเช่นกันครับ
Code
// include the library code:
#include <LiquidCrystal.h>
// initialize the library with the numbers of the interface pins
LiquidCrystal lcd(12, 11, 5, 4, 3, 2);
int thisChar = 'a';
void setup() {
  // set up the LCD's number of columns and rows:
  lcd.begin(16, 2);
  // turn on the cursor:
  lcd.cursor();
}
void loop() {
  // reverse directions at 'm':
  if (thisChar == 'm') {
    // go right for the next letter
    lcd.rightToLeft();
  }
  // reverse again at 's':
  if (thisChar == 's') {
    // go left for the next letter
    lcd.leftToRight();
  }
  // reset at 'z':
  if (thisChar > 'z') {
    // go to (0,0):
    lcd.home();
    // start again at 0
    thisChar = 'a';
  }
  // print the character
  lcd.write(thisChar);
  // wait a second:
  delay(1000);
  // increment the letter:
  thisChar++;
}
Example 7 : กำหนดทิศทางการเขียนข้อความ (scrollDisplayLeft() และ scrollDisplayRight())
ตัวอย่างนี้จะใช้คำสั่งเพื่อเลื่อนข้อความ(ทั้งข้อความ)ไปในทิศทางที่เรากำหนด
ใช้คำสั่ง (method) scrollDisplayLeft() เพื่อเลื่อนข้อความไปทางซ้าย
ใช้คำสั่ง (method) scrollDisplayRight() เพื่อเลื่อนข้อความไปทางขวา
โดยตัวอย่างจะพิมพ์ Hello World! โดยเลื่อนจากนอกหน้าจอ(ทางขวา)ไปทางซ้าย จนสุดหน้าจอ (ทางซ้าย)
และเลือนกลับจากนอกหน้าจอ(ทางซ้าย) ไปทางขวา จนสุดหน้าจอ (ทางขวา)
Hardware
เหมือนด้านบนนะครับ
Circuit
ก็ต่อเหมือนด้านบนเช่นกันครับ
Code
// include the library code:
#include <LiquidCrystal.h>
// initialize the library with the numbers of the interface pins
LiquidCrystal lcd(12, 11, 5, 4, 3, 2);
void setup() {
  // set up the LCD's number of columns and rows:
  lcd.begin(16, 2);
  // Print a message to the LCD.
  lcd.print("hello, world!");
  delay(1000);
}
void loop() {
  // scroll 13 positions (string length) to the left
  // to move it offscreen left:
  for (int positionCounter = 0; positionCounter < 13; positionCounter++) {
    // scroll one position left:
    lcd.scrollDisplayLeft();
    // wait a bit:
    delay(150);
  }
// scroll 29 positions (string length + display length) to the right
  // to move it offscreen right:
  for (int positionCounter = 0; positionCounter < 29; positionCounter++) {
    // scroll one position right:
    lcd.scrollDisplayRight();
    // wait a bit:
    delay(150);
  }
// scroll 16 positions (display length + string length) to the left
    // to move it back to center:
  for (int positionCounter = 0; positionCounter < 16; positionCounter++) {
    // scroll one position left:
    lcd.scrollDisplayLeft();
    // wait a bit:
    delay(150);
  }
// delay at the end of the full loop:
  delay(1000);
}
Example 8 : รับข้อความจาก Serial และแสดงผลบน LCD (Serial Input)
ตัวอย่างนี้จะใช้คำสั่งเพื่อรับค่าจาก Serial แล้วนำไปแสดงผลบน LCD ครับ
Hardware
เหมือนด้านบนนะครับ
Circuit
ก็ต่อเหมือนด้านบนเช่นกันครับ
Code
// include the library code:
#include <LiquidCrystal.h>
// initialize the library with the numbers of the interface pins
LiquidCrystal lcd(12, 11, 5, 4, 3, 2);
void setup(){
    // set up the LCD's number of columns and rows:
  lcd.begin(16, 2);
  // initialize the serial communications:
  Serial.begin(9600);
}
void loop()
{
  // when characters arrive over the serial port...
  if (Serial.available()) {
    // wait a bit for the entire message to arrive
    delay(100);
    // clear the screen
    lcd.clear();
    // read all the available characters
    while (Serial.available() > 0) {
      // display each character to the LCD
      lcd.write(Serial.read());
    }
  }
}
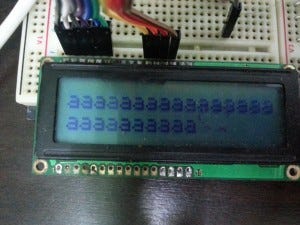
Example 9 : กำหนดตำแหน่งของ cursor ด้วย setCursor()
ตัวอย่างนี้จะใช้คำสั่งเพื่อกำหนดแหย่งของ cursor ครับ
เช่นเราอยากให้ข้อความแสดงที่ตำแหน่งของหน้าจอ
ถ้าหน้าจอ LCD ขนาด 2 แถว (row) x 16 ช่อง (column)
lcd.setCursor(0,0); //บนซ้าย
lcd.setCursor(15,0); //บนขวา
lcd.setCursor(0,1); //ล่างซ้าย
lcd.setCursor(15,1); //ล่างขวา
จากตัวอย่างก็จะทำการพิมพ์ a จนเต็มแถวบนและแถวล่าง แล้วเปลี่ยนไปพิมพ์ b-z ครับ
Hardware
เหมือนด้านบนนะครับ
Circuit
ก็ต่อเหมือนด้านบนเช่นกันครับ
Code
// include the library code:
#include <LiquidCrystal.h>
// these constants won't change.  But you can change the size of
// your LCD using them:
const int numRows = 2;
const int numCols = 16;
// initialize the library with the numbers of the interface pins
LiquidCrystal lcd(12, 11, 5, 4, 3, 2);
void setup() {
  // set up the LCD's number of columns and rows:
  lcd.begin(numCols,numRows);
}
void loop() {
  // loop from ASCII 'a' to ASCII 'z':
  for (int thisLetter = 'a'; thisLetter <= 'z'; thisLetter++) {
    // loop over the columns:
    for (int thisCol = 0; thisCol < numRows; thisCol++) {
      // loop over the rows:
      for (int thisRow = 0; thisRow < numCols; thisRow++) {
        // set the cursor position:
        lcd.setCursor(thisRow,thisCol);
        // print the letter:
        lcd.write(thisLetter);
        delay(200);
      }
    }
  }
}
Example 10 : autoscroll()
ตัวอย่างนี้จะใช้คำสั่ง autoscroll() เพื่อกำหนดให้ข้อความเลื่อนไปทางซ้ายหรือขวา
autoscroll() เลื่อนข้อความทั้งหมดไปทางซ้าย 1 ช่อง ทุกครั้งที่มีการเพิ่มตัวอักษร
noAutoscroll() ยกเลิกการเลื่อน
จากตัวอย่างจะเริ่มจากพิมพ์ 0-9 แถวบนแบบปกติ
จากนั้นจะพิมพ์ 0-9 แบบ autoscroll() ที่บรรทัดที่ 2
Hardware
เหมือนด้านบนนะครับ
Circuit
ก็ต่อเหมือนด้านบนเช่นกันครับ
Code
// include the library code:
#include <LiquidCrystal.h>
// initialize the library with the numbers of the interface pins
LiquidCrystal lcd(12, 11, 5, 4, 3, 2);
void setup() {
  // set up the LCD's number of columns and rows:
  lcd.begin(16,2);
}
void loop() {
  // set the cursor to (0,0):
  lcd.setCursor(0, 0);
  // print from 0 to 9:
  for (int thisChar = 0; thisChar < 10; thisChar++) {
   lcd.print(thisChar);
   delay(500);
  }
// set the cursor to (16,1):
  lcd.setCursor(16,1);
  // set the display to automatically scroll:
  lcd.autoscroll();
  // print from 0 to 9:
  for (int thisChar = 0; thisChar < 10; thisChar++) {
    lcd.print(thisChar);
    delay(500);
  }
  // turn off automatic scrolling
  lcd.noAutoscroll();
// clear screen for the next loop:
  lcd.clear();
}
อ้างอิง
http://arduino.cc/en/Tutorial/LiquidCrystal
http://arduino.cc/en/Tutorial/LiquidCrystalBlink
http://arduino.cc/en/Tutorial/LiquidCrystalCursor
http://arduino.cc/en/Tutorial/LiquidCrystalDisplay
http://arduino.cc/en/Tutorial/LiquidCrystalTextDirection
http://arduino.cc/en/Tutorial/LiquidCrystalScroll
http://arduino.cc/en/Tutorial/LiquidCrystalSerial
http://arduino.cc/en/Tutorial/LiquidCrystalSetCursor
http://arduino.cc/en/Tutorial/LiquidCrystalAutoscroll


ความคิดเห็น
แสดงความคิดเห็น